
#
Environment Injector Plugin

This tutorial explains to you how to define environment variables in Jenkins.
There are many way we can define environment variables in Jenkins. One of them is by installing Environment Injector Plugin.
#
Environment Injector Plugin installation
From the "Dashboard", click on "Manage Jenkins", click on "Manage Plugins".
From "Available plugins" tab search for "Environment Injector".
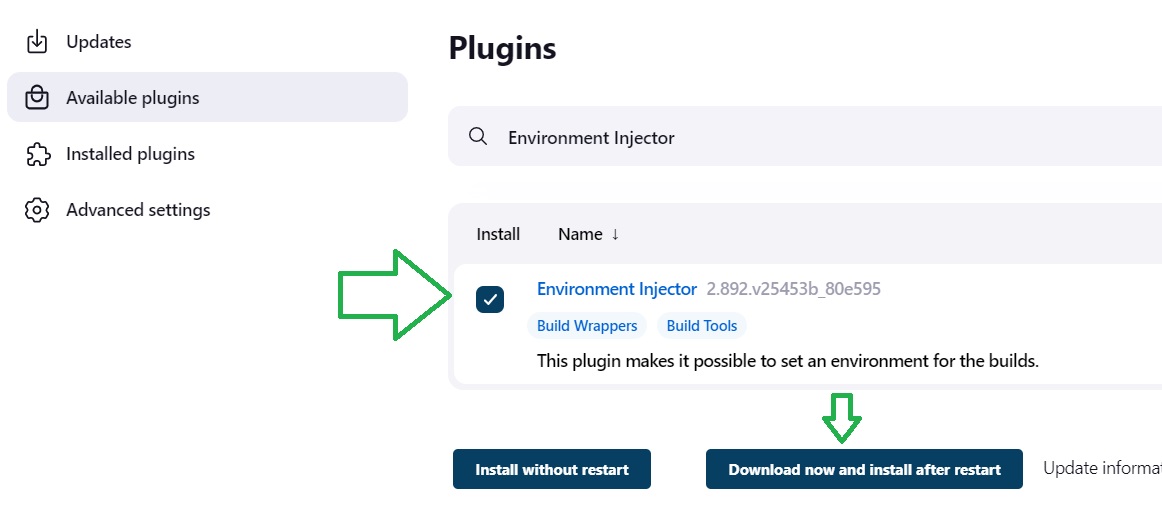
Check the plugin and click on "Download now and install after restart".
You will see something like this:
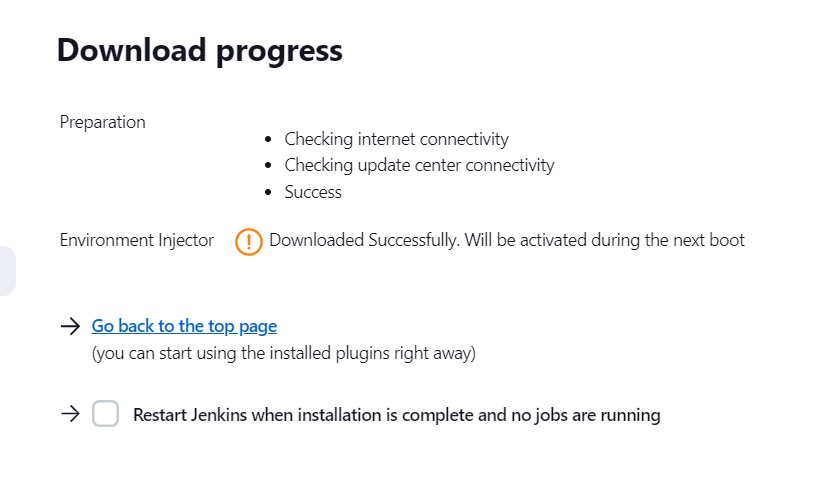
You can click on "Restart Jenkins when installation is complete and no jobs are running" and Jenkins will restart. When Jenkins is up and running again, the plug in is installed.
#
Environment Injector Plugin usage
When Environment Injector Plugin is installed you can see "Inject environment variables to the build process"
in the "Build Environment" area.
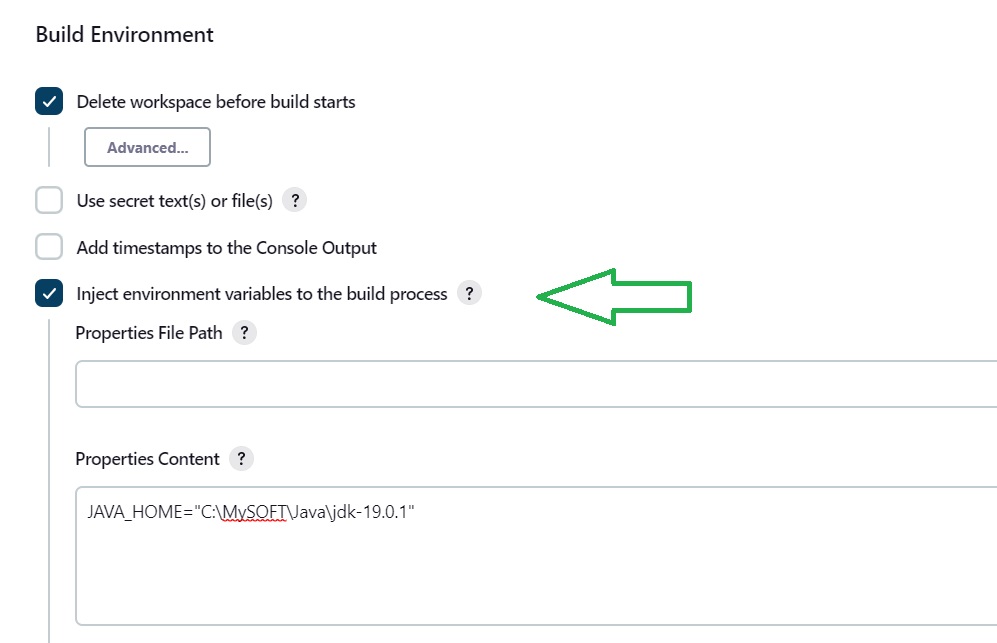
Here you can set the JAVA_HOME for instance and use it in the "Build Steps" area:

When we run the job we can see in the Output Console :
Started by user admin
Running as SYSTEM
[EnvInject] - Loading node environment variables.
Building in workspace C:\ProgramData\Jenkins\.jenkins\workspace\Job1
[WS-CLEANUP] Deleting project workspace...
[WS-CLEANUP] Deferred wipeout is used...
[WS-CLEANUP] Done
[EnvInject] - Executing scripts and injecting environment variables after the SCM step.
[EnvInject] - Injecting as environment variables the properties content
JAVA_HOME="C:\MySOFT\Java\jdk-19.0.1"

[EnvInject] - Variables injected successfully.
[Job1] $ cmd /c call C:\WINDOWS\TEMP\jenkins359953015010076928.bat

C:\ProgramData\Jenkins\.jenkins\workspace\Job1>echo "C:\MySOFT\Java\jdk-19.0.1"
"C:\MySOFT\Java\jdk-19.0.1"

C:\ProgramData\Jenkins\.jenkins\workspace\Job1>exit 0
Finished: SUCCESS
Enjoy using environment variables in Jenkins!