#
Create Declarative Pipeline

This tutorial explains to you how we can create a declarative pipeline in Jenkins.
In Jenkins, a pipeline is a collection of events or jobs which are interlinked with one another in a sequence.
Jenkins pipelines can be written using two types of syntax:
Declarative: more recent, designed to make writing and reading Pipeline code easierScripted: written in Groovy, no limits as to what a scripted pipeline can do programmatically, but very hard to maintain
Info
Declarative pipelines break down stages into multiple steps, while in scripted pipelines there is no need for this.
The code of the pipeline could be written directly in Jenkins UI or could be written in Jenkinsfile,
and is kept into the project’s source code in a Git repository. Jenkinsfile could be written in
declarative or scripted manner.
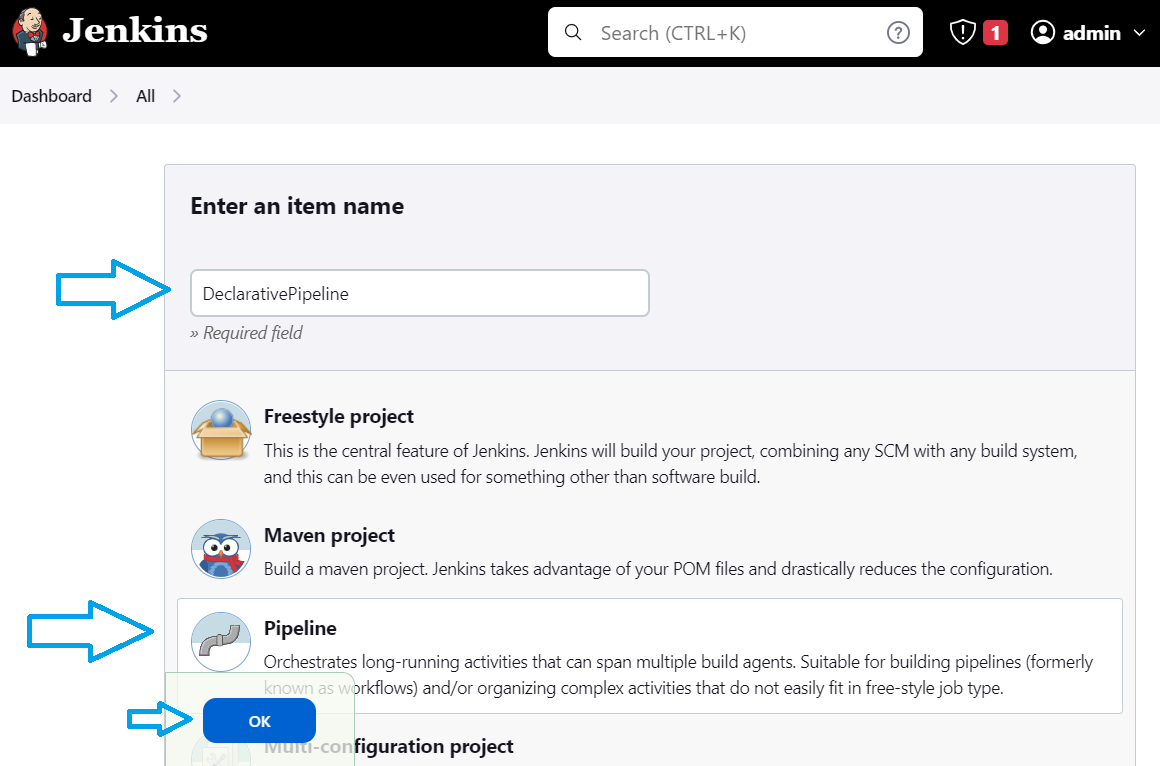
In order to create and test the Declarative Pipelines, first, we need to create a new declarative pipeline:
Once created, we need to create (if we don't have already) a GitHub repository and a file named Jenkinsfile in it.
In my case I use a classical example of Jenkinsfile :
pipeline {
    agent any

    stages {
        stage('Build') {
            steps {
                echo 'Building..'
                bat "dir"
            }
        }
        stage('Test') {
            steps {
                echo 'Testing..'
            }
        }
        stage('Deploy') {
            steps {
                echo 'Deploying....'
            }
        }
    }
}
Info
bat "dir" line is for running a Windows command. That means Jenkins is running on Windows.
Now we need to configure the Jenkins pipeline. We go to the Job configuration page in the Jenkins administration console.
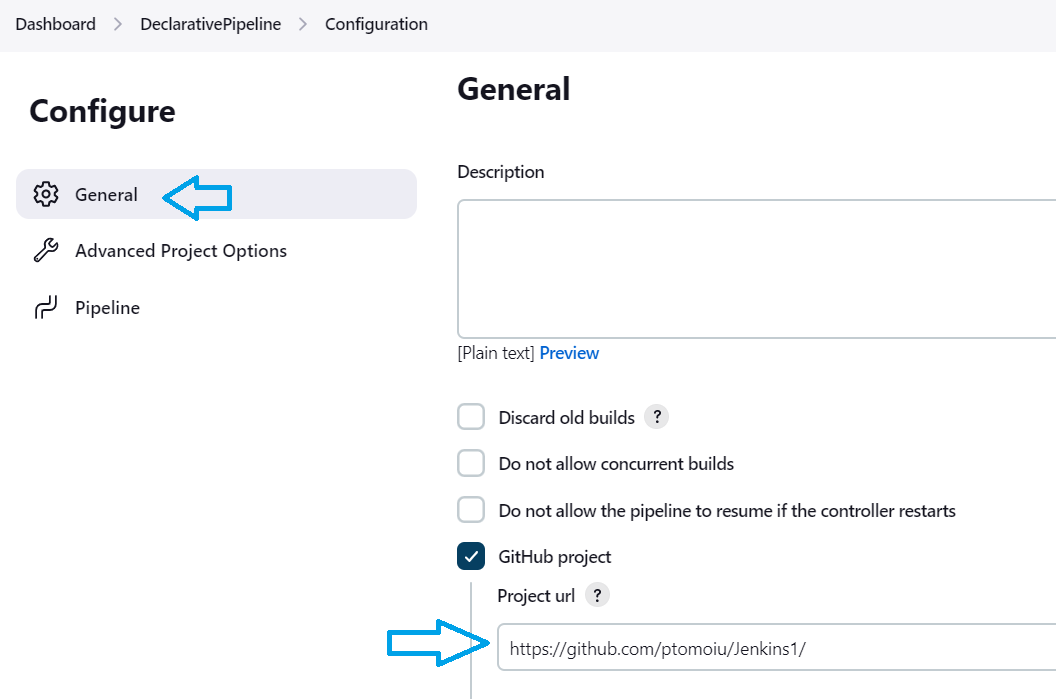
From the "General" tab, we need to set the Project url.
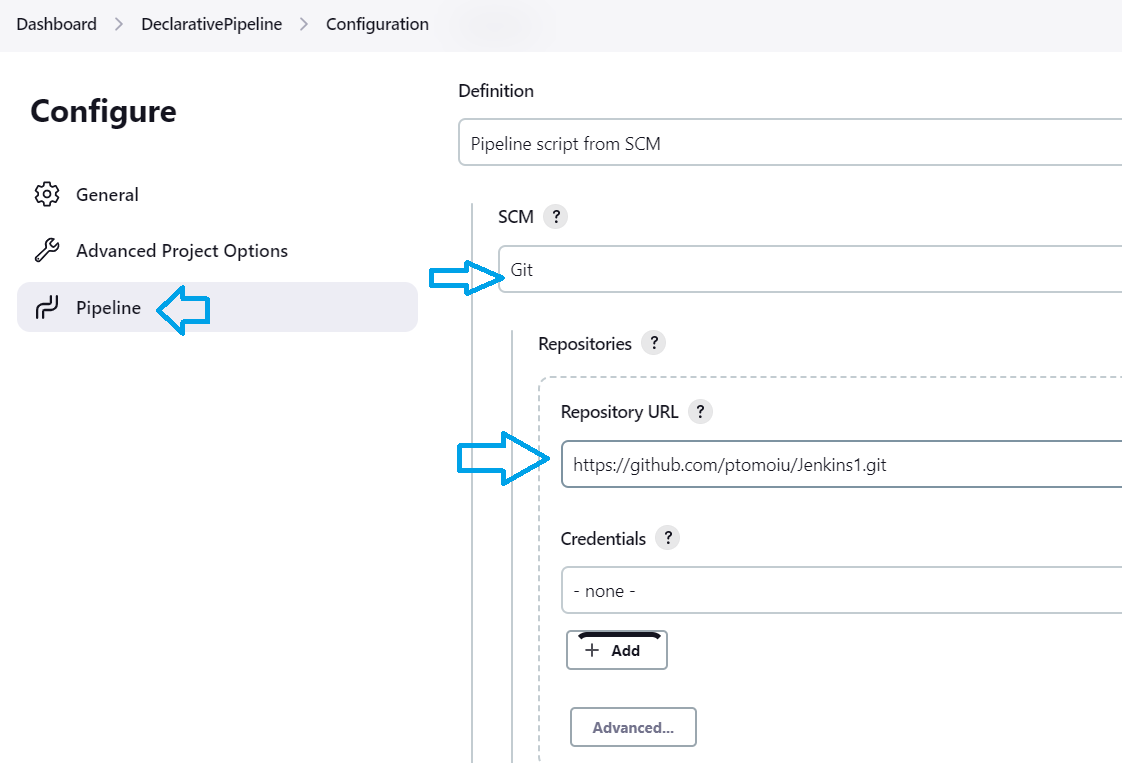
From the "Pipeline" tab, we need to set the SCM system and the repository URL.
Info
Because my GitHub repository is public I don't need any credentials.
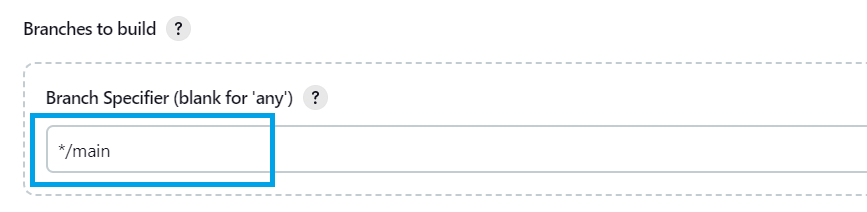
Choose the branch from the GitHub you want to use.

Choose the file which will be used for creating the Declarative Pipeline and click on "OK" button.
Now all is configured and set up.
Let's test it.
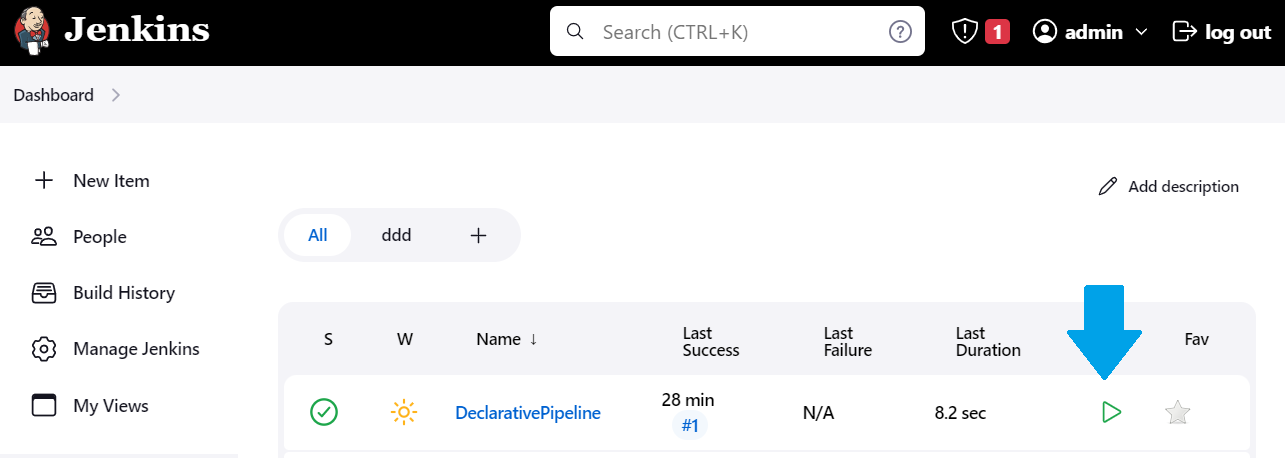
From the Dashboard we can run the pipeline:
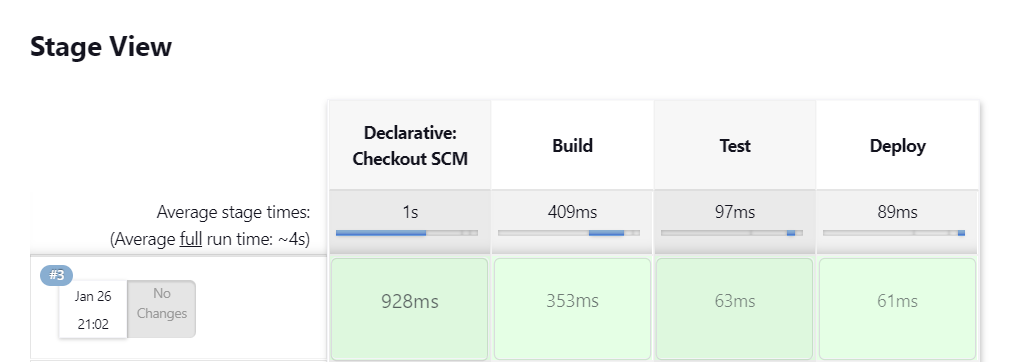
And here we have the execution of the job: